The ignition coil, of course, is one component of the engine responsible for creating the necessary voltage to fire the spark plug. If it is faulty or damaged, the engine would not really start; hence, you need to replace the ignition coil in such instances. To check if the ignition coil is damaged, you can use a multimeter.
How Does Ignition Coil Work on Small Engine?
If you inspect the small engine of a small engine, you will find the ignition coil mounted adjacent to the flywheel. The flywheel is the engine part that spins when the starting rope is pulled. The flywheel comes with permanent magnets, and these magnets pass near the coil while the flywheel spins.
The magnets’ proximity to the coil generates the necessary voltage via magnetic induction. The induced voltage travels via the wire that connects the spark plug to the coil, resulting in a spark that ignites the fuel inside the combustion chamber.
Basic Ignition Coil Testing Procedures Using Multimeter
To figure out whether the ignition coil is the reason behind the inability of the small engine to start, you should do a test on your ignition coil. The following procedures on how to test the ignition coil using a multimeter will help you breeze through the testing process:
Test for Continuity in the Circuit
If you will look closely at the ignition coil, you would notice that it is made of a single wire that winds countless times around a core. This winding wire should be continuous, and any break in this wire will render the coil useless. You don’t need to unsheathe the wire to see if there is any break in it, otherwise, you would look ridiculous if you do so. You only need to pass a current along the wire and check for resistance using an ohmmeter.
If there is no break, you’ll get measurements between 2,500 and 5,000 ohms in the ohmmeter. If it is broken, you’ll get infinite resistance.
Locate the Ignition Coil
To test for continuity, you need to find the coil and expose the housing of the coil. The engine usually obscures the housing. Hence, you need to engage in a bit of dismantling to expose the housing. Sometimes you need to remove several screws to uncover the coil housing.
You can also follow the lead of the spark plug wire because it will lead you to the coil. The end of the spark plug wire leads to a metal box where you will find the coil.
Set Up the Ohmmeter
Before using the ohmmeter, you need to set it up first. Set the ohmmeter in the 20-thousand-ohm range. If you are using a multimeter, you can set its dial to a 20-K scale. Afterward, you can hook the red lead to the common jack and the black lead to the jack with the ohm symbol.
Test the ohmmeter if it is working before checking for continuity. You can check for continuity by tapping the leads to each other to verify if it is reading close to zero. If the leads don’t touch each other, the meter should read infinity or one.
As a caveat, before engaging in ignition coil testing, you need to ensure that you check the user’s manual to know more about the service engine used in your equipment. Check the resistance value table of the ignition coil in the user’s manual.
Testing Procedure
Once you were able to expose the ignition coil of the lawnmower or any small engine you are using, you can disconnect the wires connected to it, save for the one connected to the spark plug. Afterward, you can pull the spark plug wire’s other end off the spark plug, and move it from the spark plug.
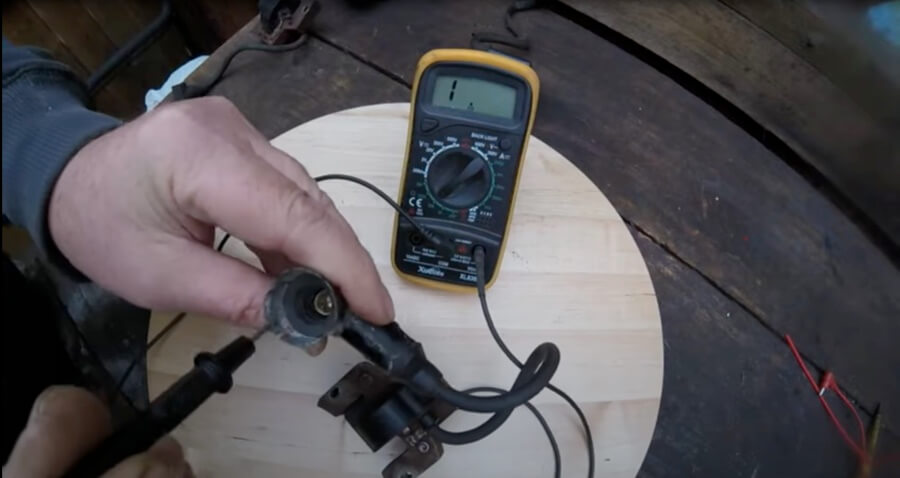
Then, insert the red lead’s end inside the boot of the spark plug and tap the metal plate along the boot’s deepest part. Scratch on the metal plate the lead to get the lead in contact with the metal plate.
Afterward, you can touch the black lead to the housing of the metal coil and observe the meter. If it indicates a value between 2.5 – 5 K ohms, the coil is in good condition. If it suggests an infinity sign or “1”, you got a damaged coil, and you need to replace it.
10 Basic Steps to Test the Ignition Coil Using the Multimeter
Looking at the procedures provided above, you will notice that the testing of the ignition coil is pretty straightforward and could be summarized into ten basic steps. You also need to get a hand on the service manual of the lawnmower engine to gain access to the resistance value table of your small engine. Here is a rundown of these ten simple steps:
- Set up your multimeter to 20K ohms measurement mode.
- Read the user’s manual.
- Locate the ignition coil value table for resistance/tolerance inside the manual.
- Insert the multimeter’s one end lead to a high-tension spark plug cap. Position the multimeter’s other end on the coil’s base.
- You should get a resistance value within the indicated range in the value table.
- Position the multimeter’s one end onto the kill wire terminal of the coil while you place the other end of the multimeter to the base of the coil.
- The multimeter should provide you with a resistance value that is within the indicated values in the manual.
- Check the manual for the specific values within the table when you connect the multimeter terminals on the specific points of the ignition coil.
- Then place the multimeter’s end to the kill wire terminal while inserting the other end inside the cap of the spark plug. Check for the resistance value.
- If the values indicated by the multimeter do not fall within the values specified in the value table, it only means that your coil is damaged and needs replacement.
Additional Tips
Before engaging in testing using a multimeter, you need to check carefully the ignition coil for any damage. This step is necessary because any damage to the ignition coil will prevent it from generating the necessary voltage for the plugs. The results on the multimeter will either indicate if your circuit got short-circuited or if the coil is completely damaged. So, you need to carefully compare your readings with the user manual table.
The primary range of resistance should be between 0.3 up to 1 ohm. If the resistance measurement is below the abovementioned specifications, it may indicate that the primary winding of your coil got shorted.
If it exceeds the recommended range, then you need to replace your ignition coil. Infinite resistance is indicative that the circuit is open and that the primary winding is not completed. In such a case, you also need to replace your coil.
Guide on Purchasing a New Ignition Coil
Now that you have known that the ignition coil failed the test, you can finally decide to buy a replacement for the damaged ignition coil. It will be best to purchase an ignition coil that is similar to the one you will replace. Before purchasing a replacement coil, you need to consult the manual of your engine. So, please get the engine number.
If the engine comes with two cylinders, if one coil is damaged, you can replace the one which is damaged. But if both are damaged, you need to replace both. When buying, you need to tell the seller your engine number and the model you would like to purchase.
Conclusion
Once you’ve figured out that the real cause of the inability of the lawnmower to start is the damaged ignition coil, then you know exactly what to do, and you will no longer be scratching your head in utter ignorance about the reason behind its inability. In such a case, however, you will be required to replace the ignition coil. You also need to know how to install the replacement ignition coil.
Installing the replacement ignition coil would require you to retrace what you have done when dismantling the cover of the ignition coil. You should also install back the spark plug, assemble the casings, and retest the new ignition coil if it is working. If you do it right, you would indeed have solved the non-starting of your lawnmower.