December 21, 2023
A gas tightness test is crucial for ensuring the safety of gas installations in properties. As a key part of gas safety assessments, it involves checking gas pressure in pipework to detect leaks or weaknesses.
This test is vital in preventing gas-related accidents, such as explosions, fires, and exposure to harmful gases. Conducting the test requires a gas test gauge, a tool designed to measure gas pressure and detect any significant fluctuations indicating a leak.
The process includes attaching the gauge to the gas meter, monitoring pressure levels, and analyzing the results to confirm the system’s integrity. This overview highlights the importance and methodology of performing a gas tightness test, underscoring its role in upholding gas safety.
Preparation for the Test
Proper gas testing equipment is vital for accurately conducting a gas tightness test. These tools ensure safety by detecting leaks and preventing potential hazards.
Reliable and precise equipment is essential for effective testing.
Types of Gas Test Gauges
Different gas test gauges are used based on the specific requirements of the test.
Each type has unique features suitable for various situations.
1. Electrochemical Sensors
Electrochemical sensors are effective for detecting gases like carbon monoxide. They measure electrical currents caused by gas-induced chemical reactions, offering high sensitivity and accuracy.
2. Catalytic Bead Sensors
These sensors detect combustible gases through gas oxidation. Catalytic bead sensors compare the temperature change in an active bead with a reference bead to identify gas presence.
3. Photoionization Sensors
Ideal for detecting volatile organic compounds, photoionization sensors use ultraviolet light to ionize gas molecules and measure the resulting current to determine gas concentration.
4. Infrared Point Sensors
Infrared point sensors work by measuring the absorption of infrared light by gas molecules. They are particularly effective for detecting carbon dioxide and hydrocarbon gases.
5. Semiconductor Sensors
Semiconductor sensors detect gases by measuring changes in electrical resistance when a gas interacts with a chemically sensitive material. They are commonly used for a wide range of gases.
Conducting the Tightness Test
Step-by-Step Procedure
The tightness test is a systematic process that requires careful attention to detail to ensure accurate results.
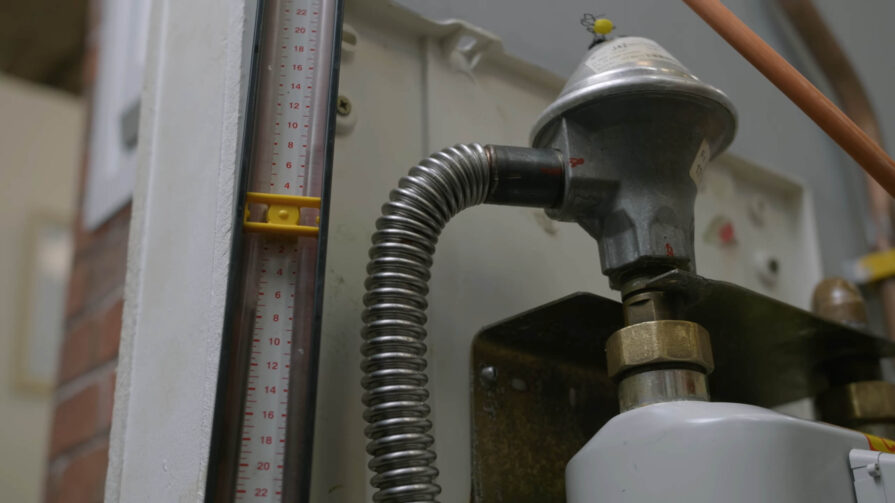
1. Connecting the Gauge to the Gas Meter
Begin by securely attaching the gas test gauge to the gas meter. This connection is crucial for obtaining an accurate reading of the gas system’s pressure.
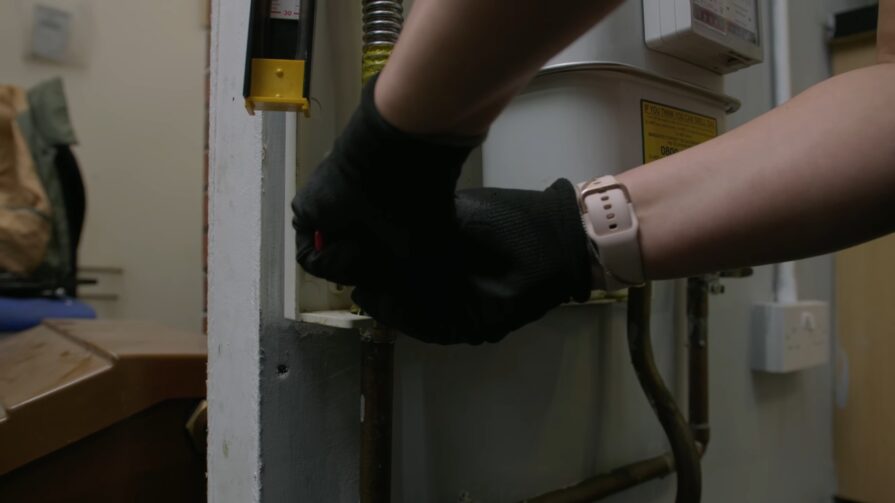
2. Zeroing the Gauge
After establishing a connection, it is crucial to calibrate the gauge by zeroing it. The process entails adjusting the gauge to display zero before commencing the test, guaranteeing precise readings in the future.
Initial Pressure Check
The initial pressure check is critical in identifying any immediate signs of gas leaks.
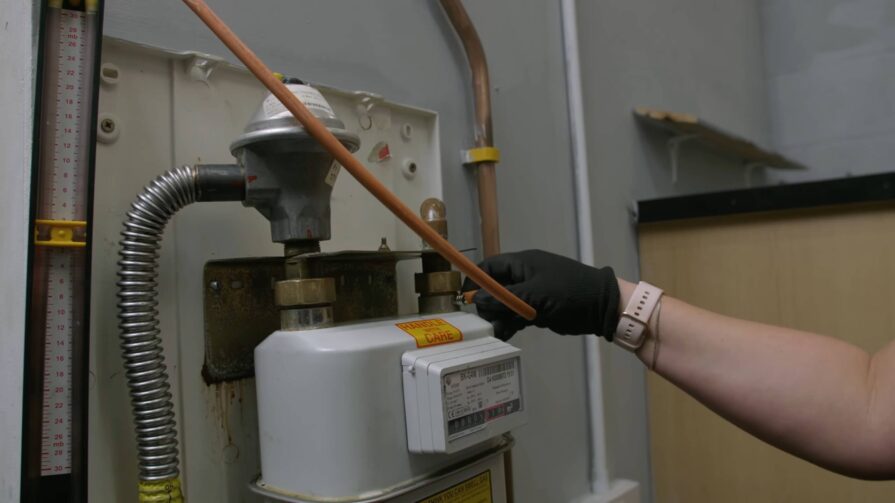
1. Opening and Closing the Supply Valve
Briefly open the supply valve and then close it. This action allows gas to fill the pipework and pressurize the system for testing.
2. Observing Gauge for 1 Minute
Watch the gauge for one minute. During this time, the gauge should show no movement if the system is secure.
3. Identifying Potential Gas Leaks
If the gauge indicates a rise in pressure during this period, it may suggest a potential gas leak, necessitating further investigation.
Detailed Testing Procedure
Precise pressure adjustment is crucial for an accurate tightness test.
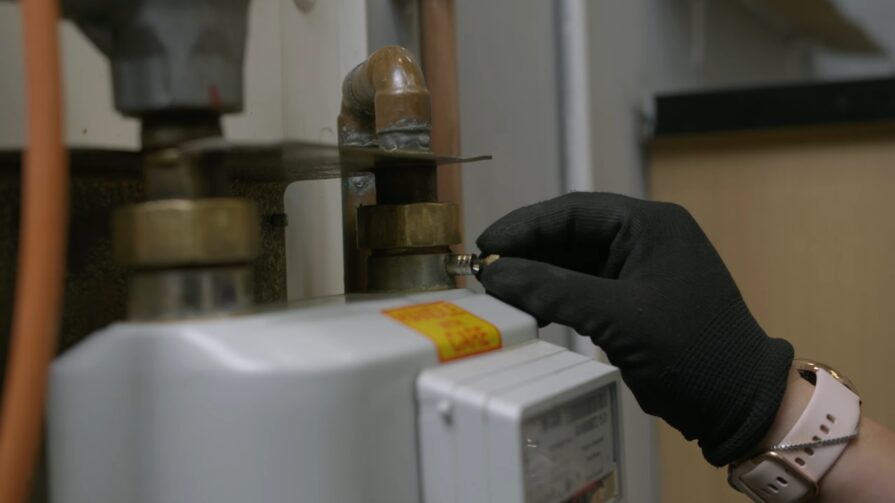
1. Setting Valve to 20 mbar
Adjust the valve to increase the pressure to exactly 20 mbar. This specific pressure level is essential for a standardized test.
2. Waiting for Temperature Stabilization
After setting the pressure, wait for the system to stabilize. This ensures that temperature variations do not affect the test results.
A longer observation period is necessary to confirm the system’s integrity.
3. 2-Minute Gauge Observation
Observe the gauge for a continuous period of two minutes. During this time, monitor the gauge closely for any changes in the readings.
4. Ensuring No Pressure Drop
Ensure that there is no drop in pressure during these two minutes. A stable pressure reading indicates no leaks, confirming the system’s tightness.
Post-Test Procedures
Removing the Gauge
After completing the test, carefully disconnect the gas test gauge from the gas meter. This should be done gently to avoid damaging the meter or the gauge.
Resealing the Test Point
Once the gauge is removed, it’s important to reseal the test point. This ensures that no gas escapes from the point where the gauge was connected.
Use appropriate sealing materials and methods as per safety standards.
Checking for Leaks
Finally, conduct a thorough check for any leaks at the test point and around the gas meter. This can be done using leak detection solutions or electronic leak detectors.
Ensure that the area is completely secure and leak-free before considering the test complete.
FAQ
How often should a gas tightness test be conducted in residential properties?
Gas tightness tests in residential properties should ideally be conducted annually. This frequency ensures that any potential leaks or issues with the gas system are identified and addressed promptly to maintain safety.
Can a homeowner perform a gas tightness test, or must it be done by a professional?
A gas tightness test should be performed by a qualified professional. Gas-safe engineers have the necessary training, experience, and equipment to conduct the test safely and accurately.
What should be done if a gas leak is detected during the test?
If a gas leak is detected, the gas supply should be shut off immediately, and a qualified professional should be contacted to repair the leak. It’s crucial not to use any electrical switches or open flames until the leak is fixed.
Are there any specific environmental conditions that affect the accuracy of a gas tightness test?
Yes, environmental factors like temperature and humidity can affect the accuracy of a gas tightness test. It’s important to conduct the test in stable environmental conditions to ensure reliable results.
How long does a typical gas tightness test take to complete?
A typical gas tightness test usually takes between 30 minutes to an hour, depending on the complexity of the gas system and the size of the property.
Is there a difference in the testing procedure for natural gas and LPG systems?
While the fundamental principles of the test remain the same, there may be slight variations in the procedure and the pressure settings used for natural gas and LPG systems. It’s important to follow the specific guidelines applicable to the type of gas being tested.
Final Words
Conducting a gas tightness test with a gas test gauge is a critical procedure for ensuring the safety and integrity of gas installations. From the meticulous preparation involving the selection of the right testing equipment to the detailed steps of the testing process, each phase plays a vital role in identifying potential leaks and preventing hazardous situations.
The post-test procedures, including careful removal of the gauge and thorough leak checks, further underscore the importance of diligence in maintaining gas safety. This guide highlights the essential steps and considerations, emphasizing the importance of precision and safety in gas tightness testing.