June 17, 2021
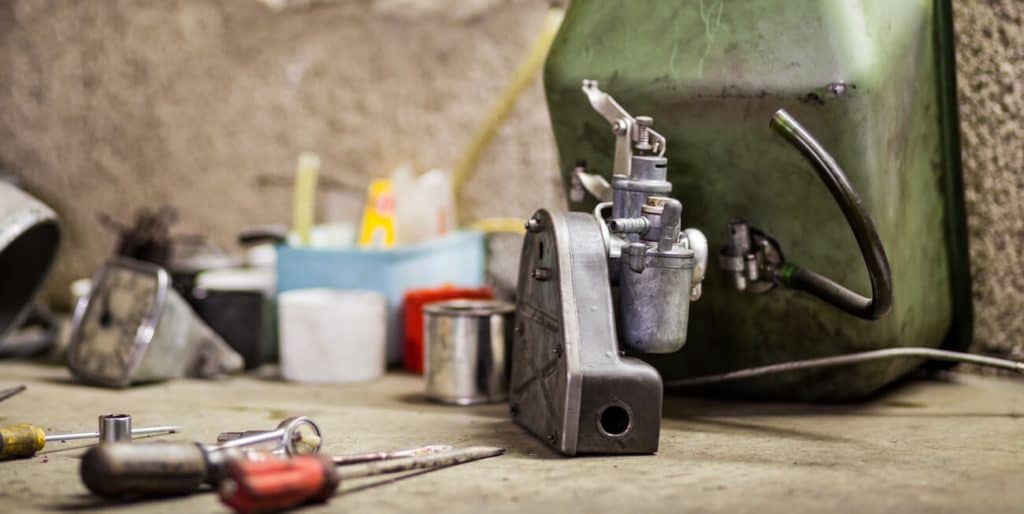
One of the most critical parts of a small engine is the small engine carburetor. The small engine carburetor is the part that enables the mixing of fuel, and air and this mixing of air and fuel is essential for the functioning of an engine. If you would look intently at the carburetor, you would notice that its design appears to be very simple. Moreover, it belongs to the simple devices of the small engine. However, despite its simplicity, it is very essential to the engine. Furthermore, it requires regular maintenance for its continuous functioning.
What Is Carburetor in Small Engine?
The word “carburetor” is the American version of the British word “Carburettor.” As mentioned above, it creates the proper mixture of air and fuel inside the small engine to create internal combustion. It maintains the proper ratio of air and fuel mixture to create this internal combustion. In UK and USA, it is colloquially called “carb” while in Australia, it is termed colloquially as “carby.”
In the latter years, the carburetor has been largely replaced in most automotive. To some extent likewise, the carburetor has been gradually replaced in aviation industry by the introduction of fuel injection. However, in small engines, the carburetor is still widely used, specifically, in rototillers, lawn mowers, and other equipment that have small engines.
Replacement Carburetors For Small Engine
How Does a Carburetor Work?
The engine needs internal combustion to power an equipment. Hence, as the engine works, it is igniting a continuous stream of fuel and air mixture. The engine theoretically will continue to run, and the crankshaft will continue to rotate as long as the mixture is continuously fed to the spark plug chamber. It is the function of the carburetor to consistently and accurately mix fuel and air. As the fuel flows out of the fuel tank and moves through a hose towards the carburetor, the carburetor allows the fuel to drip into its bowl slowly. The engine then creates a suction on the carburetor that mixes air with gasoline at a certainly specified ratio. The following are the essential functions of the carburetor:
- It measures the engine’s airflow.
- It perfectly mixes air and fuel.
- It lets the correct amount of fuel for the right air/fuel mixture and adjusts this flow based on factors like that of the temperature.
If the fuel is consistent in its behavior because it has consistent fluid drag, inertia, viscosity, and other characteristics, then the job of the carburetor is greatly simplified. However, air and fuel like gasoline are continuously changing their properties and are fraught with deviations. Hence, the carburetor really has a hell of a job of balancing the mixture of air and fuel. It has the complicated function of ensuring that the fuel/air mixture is balanced across varied ambient temperature, engine speeds, atmospheric pressures, centrifugal forces, and loads forces and pressures. It does this function even in the following instances:
- Hot start
- cold start
- Acceleration
- Idling
- Cruising
- High speed at full throttle
Moreover, contemporary carburetors must maintain this mixture without increasing the level of the engine emissions. The carburetor can achieve optimum levels of functioning and its varied operating modes because of the complex mechanism called “circuitry” that is embedded in this simple device.
Primary Causes of Problems in The Carburetor
As mentioned above, fuel like gasoline is very volatile. They tend to evaporate easily. Hence, the biggest reason behind every carburetor problem is the evaporation of fuel. Regular evaporation of fuel may lead to the accumulation of a gum-like substance within the carburetor. This accumulation may hamper the carburetor from properly functioning or may eventually bog down the carburetor. The accumulation of this gum-like substance may lead to the inability of the fuel to flow freely once the needle gets stuck. Another possible problem is when a debris or dirt lodges into the carburetor via the air intake passage.
How To Tune a Small Engine Carburetor
Small engines usually have a carburetor that is float-type. In fact, almost all of them follow a similar basic design. If you are cognizant of some mechanical principles, you will surely find the process of fine-tuning your carburetor easy. At the onset, you should bear in mind that the carburetor is a sensitive and delicate equipment.
For this reason, you can easily inadvertently damage it with a single miscalculation. Hence, you simply need to do a light touch on the carburetor to fine-tune and maintain it. During a comprehensive tune-up of your engine, the carburetor is usually fine-tuned while the float bowl is thoroughly cleaned. Below are the simple steps that you can follow to fine-tune your small engine carburetor:
Step 1) Removing and Cleaning the Air Cleaner
To remove the air cleaner, you need to unscrew the cover of the air cleaner using a flat head screwdriver. Afterward, you can pull out the filter of the air cleaner. You should thoroughly clean the air filter using an air duster. You can blow the dirt off the air cleaner filter by pointing the air duster starting from the inside. Then, you can replace the air cleaner element and immediately tighten up the cover of the air cleaner.
Step 2) Locate the Fuel Bowl and Open It
The second thing that you should do is to locate the fuel valve that leads to the carburetor. Then, you should set it on the “off” position. Under the carburetor, you will see the fuel bowl. You can unscrew the lone screw on the fuel bowl base using a flat-head screwdriver. You should be very careful in doing this for you may accidentally misalign or bend the float inside. This float is maintained at a certain level to prevent the flooding of the carburetor: hence, any misalignment may cause flooding to the carburetor.
Step 3) Cleaning of the Fuel Bowl
To clean the fuel bowl, you need to pour out all the residual gasoline and then wipe off all the dregs that have accumulated in the fuel bowl using a rag. Afterward, you should also wipe the fuel bowl rim to prevent any dirt from dropping into the carburetor’s bottom when you put it back. Then, you can reposition the fuel bowl on the carburetor’s bottom and screw the bowl back into its place. Refrain from overtightening the screw because it will be counterproductive. The screw should be rightly tightened just to prevent any leak when the engine starts.
Step 4) Turning Back the Lever to “On” Position
Once you’ve set the fuel bowl back, you should set the lever of the fuel valve back to the “On” position. Then, you can start the engine and let it warm up to its operating temperature. You can rev up the engine once or twice to prevent the buildup of carbon if the engine stays in extended idle mode. In case the engine dies out due to low rpm, you should at least turn or set the idle adjustment screw to about 1/4 turn in order to increase its idle speed.
Step 5) Locate and Turn the Air Mixture Screw Approximately 1 1/4 Turns
To turn the air mixture screw approximately 1 1/4, you need to locate it. It is situated above the carburetor, and there is only a lone screw that faces outward above the carburetor. You can see it where the air cleaner filter hose connects to it. You can also use a flat blade screwdriver to turn this screw. Turn it clockwise until the small engine almost dies. Yet, before the engine completely dies, you should turn the air mixture screw counterclockwise about 1 1/4 turn.
Step 6) Look for The Possible Smoothest Idle
To do this, you should turn the air mixture screw about one whole turn clockwise/counterclockwise. Turn the screw gradually until you find the smoothest idle. In this regard, you need to experiment a bit both ways to figure out which position of the screw achieves the smoothest idle.
Step 7) Adjust the Idle Adjustment Screw Properly
You should adjust the idle adjustment screw to prevent the engine from dying during idle speed. Turn it about 1/8 clockwise. Avoid setting very high idle speed because it may cause more fuel consumption and may decrease the engine’s life.
How to Clean a Dirty Carburetor?
There are indications that your small engine isn’t working as it should be. Once you notice these indicators, you should not dilly-dally in cleaning the small engine’s carburetor. If your small engine emits foul-smelling smoke, for example, it may be indicative of a dirty carburetor. You should try to clean it for the first time, and once you’ve done it once or twice, you will get the hang of it and would master it along the way. Here are the simple steps on how to clean your dirty carburetor:
Step 1) Turn Off Fuel Valve
First, before starting to clean the carburetor, you should first turn off its fuel valve. Afterward, you should remove the carburetor from the engine completely. You must remove its air filter panel. Then, you should disconnect its fuel line and governor from the carburetor.
Step 2) Open The Carburetor
You should open up the carburetor. You should hold the carburetor over a bucket, and then remove its screw and then take off the bowl. There would surely be left over fuel in the bowl; you should simply let the fuel drain into the bucket.
Step 3) Inspect Its Needle
Afterwards, you should carefully study the layout of the carburetor’s interior. Then, you should inspect its needle to figure out if it is sticking or is stuck. The needle should be freely moving. Like a small bullet-shaped device, the needle is usually made of plastic. It may also have a bit of aluminum covering.
Step 4) Inspect The Needle valve
You should also examine the needle valve’s tip. On its tip, there may be buildup of what is commonly called as “varnish.” This varnish may be invincible to the naked eye, but it does not mean that the tip of the needle is without this varnish. You should clean the needle valve using a carburetor cleaner, and then put the needle valve on a clean and dry towel. If the needle seems stuck, you surely need to clean it. Using a wire brush and brake or carburetor cleaner, you should carefully clean the needle. Afterwards, you can position it back and try to test it.
Step 5) Clean Up The Carburettor
Next, you should spray brake cleaner or carburetor cleaner to the fuel lines throughout the carburetor. Then, you should spray the hole wherein the needle valve is set. You should also spray into the hole from where you have removed the bolt. Afterwards, wipe the carburetor with dry clean cloth.
Step 6) Test
Once you have cleaned the carburetor thoroughly, you should use a carburetor test to test it.
Step 7) Reassemble The Carburetor
Then, you should reassemble the carburetor and carefully attach it back to the engine. Carefully and precisely, you should reassemble each part correctly. Then, you should test the engine to know if it will function well. If it runs smoothly, then you have correctly reassembled and cleaned it. It may take several seconds before the engine can function correctly because you have fully drained it during the cleaning process.